Rating:
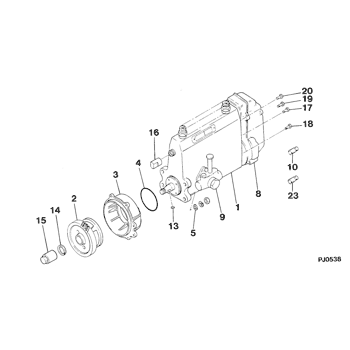
Information pump assy, injecti Denso
Components :
Scheme #.#:
№
Qty
Part num
Name
Remarks
Manufacture num
000
[01]
09300-02112
PUMP ASSY, INJECTI
A4,R801
8706-
ME006240
MITSUBISHI
Include in ##:
09300-02112
as PUMP ASSY, INJECTI
Cross reference number
Part num
Firm num
Firm
Name
09300-02112
ME006240
PUMP ASSY, INJECTI
Test Calibration Data:
0930002110
ME006240
0930002112
Information:
Illustration 1 g00564355
7W-2743 Electronic Speed Switch (ESS)
(1) Push button for Overspeed Verification
(2) Reset button
(3) Overspeed indicator lamp
(4) Seal screw plug for adjusting the engine overspeed
(5) Seal screw plug for adjusting the crank terminate speed
(6) Seal screw plug for adjusting the oil step pressure speed setting The calibration of the crank terminate adjustment can increase the crank terminate speed or the calibration of the crank terminate adjustment can decrease the crank terminate speed. The crank terminate speed determines when the starting motor is disengaged. The starting motor is disengaged when the system voltage is cancelled by the crank termination speed. At the crank terminate speed, the engine must be able to run without the assistance of the starting motor.
Remove the lockwire and the seal from seal screw plug (5). Remove seal screw plug (5) from the access hole for the crank terminate adjusting screw.
Use a small screwdriver to lightly turn the crank terminate adjusting screw in the direction of the "MAX" arrow or the clockwise direction. Turn the screw twenty times. The crank terminate adjusting screw will vary the setting of a potentiometer that is inside of the ESS. The crank terminate adjusting screw will not cause damage to the potentiometer. Also, the screw can not be removed if the screw is turned in the wrong direction.
Turn the crank terminate adjusting screw for twelve turns in the opposite direction of the "MAX" arrow or the counterclockwise direction. This will establish an approximate crank terminate setting.
Connect a voltmeter with the positive lead at terminal (ESS-12) and the negative lead at (ESS-5). Use a 6V-7070 Digital Multimeter or a voltmeter with the same accuracy. Start the engine. Record the engine rpm when the starting motor disengages. The starting motor disengages when the open circuit voltage is cancelled by the crank terminate setting. Refer to the Speed Specification Chart for the correct crank terminate setting.
If the setting in Step 4 is not correct, proceed with Steps 6, 7, and 8. If the setting is correct go to Step 8.
Stop the engine and turn the crank terminate adjusting screw for one full turn in the clockwise direction in order to increase the crank terminate speed. Turn the crank terminate adjusting screw for one full turn in the counterclockwise direction in order to decrease the crank terminate speed.
While the voltmeter is still connected, start the engine. Record the engine rpm when the starting motor disengages. The starting motor will disengage when the voltage is cancelled by the crank terminate speed. Repeat Steps 6 and 7 until the crank terminate speed is correct.
Install seal screw plug (5) in the access hole for the crank terminate adjusting screw. Tighten the screw to a torque of 0.20 0.03 N m (1.8 .3 lb in). Install the lockwire and the seal if the overspeed calibration and the oil step speed calibration are also complete.


