Rating:
Information valve assy, suctio Denso
Compare Prices: .
As an associate, we earn commssions on qualifying purchases through the links below

SCV Control Valve 8-98043687-0 294200-0650 294000-0290 294000-0294 294000-0822 for Isuzu D-MAX - (Color: 294200-0650)
Generic Color: 294200-0650
Generic Color: 294200-0650
Regulator Metering Control Valve Overhaul Kit OEM 8-98043687-0 294200-0650 8980436870 2942000650 Compatible With Isuzu
Generic
Generic

You can buy:

Include in ##:
Number on scheme 031

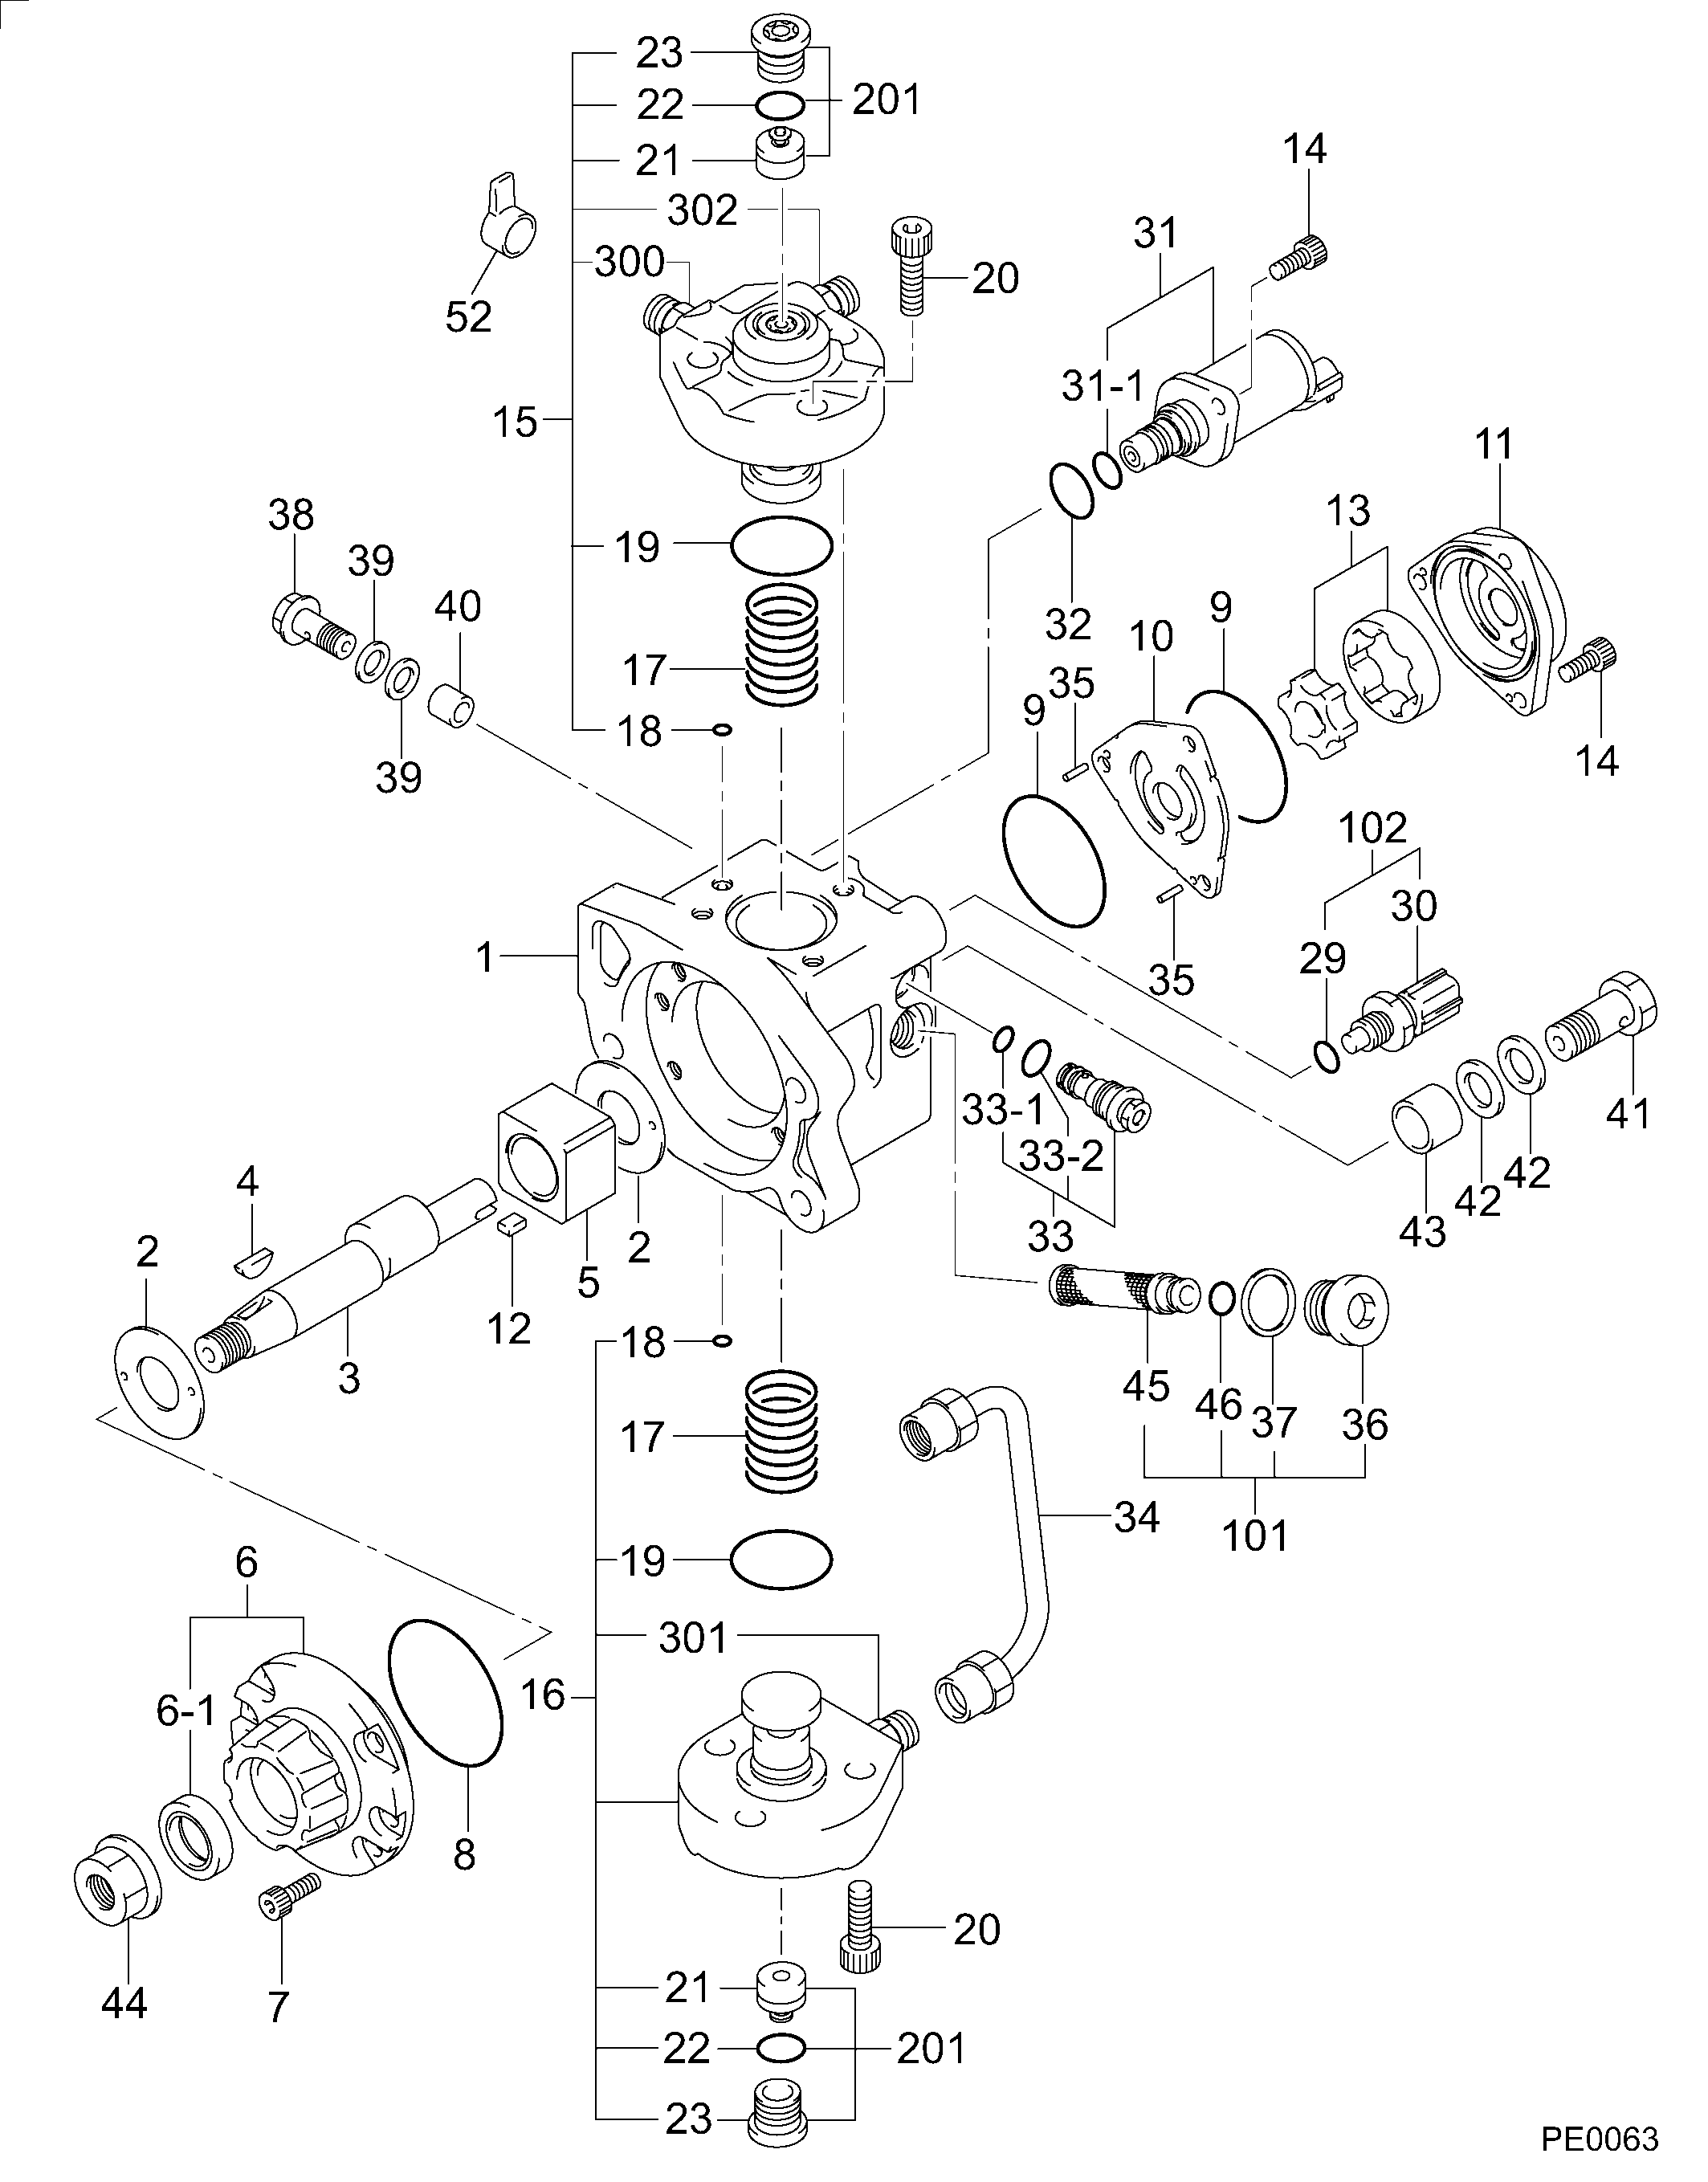
29400-00039
as VALVE ASSY, SUCTIO
Cross reference number
Part num
Firm num
Firm
Name
29420-00650
VALVE ASSY, SUCTIO
Information:
Be sure all timing pins and bolts have been removed from timing holes before turning the crankshaft.
2. Remove the nuts and cap from the connecting rod. Push the piston and connecting rod up until the piston rings are out of cylinder liner. 3. Remove the connecting rod and piston (1) from engine. Keep the caps and bearings with their respective connecting rods.Install Pistons
1. Turn the crankshaft so the bearing journal is at bottom center for piston being installed.2. Put clean engine oil on crankshaft journal, connecting rod bearings, and the piston rings. 3. Put compressor (A) on top of liner, and install the piston and connecting rod with the "V" mark on piston in alignment with "V" mark on spacer plate. Put the connecting rod in position on crankshaft while pushing piston into liner. 4. Put clean engine oil on threads of connecting rod bolts. Install the caps on connecting rods. Install and tighten nuts to 30 3 lb.ft. (4.1 0.4 mkg). Put a mark across the nuts and bolts; and turn nuts clockwise 90° from marks as shown.
Make sure the number mark on side of cap is the same number and on the same side as the number mark on side of connecting rod.
end by: a) install oil pumpb) install cylinder head assembly