Rating:
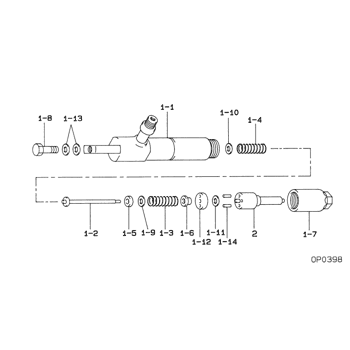
Information seat, spring Denso
Include in ##:
09350-06010
as SEAT, SPRING
Cross reference number
Part num
Firm num
Firm
Name
09312-80910
SEAT, SPRING
0931280910
ME743478
MITSUBISHI
SEAT, SPRING
Information:
Introduction
This Special Instruction provides information on installation of the newly designed HEUI pump. The new HEUI pump helps to prevent drive bearing spalling due to inconsistent force that is applied to the bearing in certain operating conditions.The overall length of the new HEUI pump is 15 mm (0.6 inch) longer. New fluid connections are required.Safety
Personal injury can result from hot coolant. Any contact with hot coolant or with steam can cause severe burns. Allow cooling system components to cool before the cooling system is drained.
Contact to high pressure fuel can cause personal injury or death. Do not allow high pressure fuel to contact your skin.
Parts List
Note: Table 1 has a list of parts associated with the new pump. Not all of these parts are needed for your engine. Select the parts needed for your engine. Additional parts will be necessary for this repair, utilize existing parts information for your specific engine.
Table 1
Old Part Number New Part Number Description
All 384-0678 or 20R-1636 Unit Injector Hydraulic Pump Gp
209-3171 387-7159 Tube As (Single wall high pressure)
241-6923 378-8430 Tube As (Dual wall high pressure )
221-3463 or 263-1785 387-9500 Tube As (Low-pressure oil line)
Components for Fuel Hose
192-2184 339-1587 (1)
Hose As
6V-8724 (1) Elbow
214-7568 (1) O-Ring Seal
228-7089 (1) O-Ring Seal
Components for Pressure Sensor Fitting
None 205-3079 (2)
Adapter
9S-8003 (2) Plug
214-7568 (2) O-Ring Seal
214-7567 (2) O-Ring Seal
( 1 ) Use only on the following serial number prefixes: S/N:C9A00001-00196, ; S/N:CSN00001-00898, and ; S/N:C9B00001-00168.
( 2 ) Use only on the following serial number prefixes: S/N:C9A00001-00500, ; S/N:C9B00001-UP, ; S/N:CSN00001-UP, ; S/N:X9X00001-00488, ; S/N:Z9X00001-00245, and ; S/N:SJB00001-00169Installation Procedure
Do not allow dirt to enter the fuel system. Thoroughly clean the area around a fuel system component that will be disconnected. Fit a suitable cover over disconnected fuel system component.
Perform a cylinder cutout test to identify any injectors that are not operating properly.
If the engine is equipped with a rectangular aftercooler, drain and remove the aftercooler. Refer to Disassembly and Assembly, SENR9664, "Aftercooler - Remove" for more information, if needed.
Remove the crankcase breather.
Illustration 1 g01867833
Draining the oil from the pump for the HEUI
Clean the exterior area of the pump for the HEUI. Clean the cover, between the cover and the housing, and around the inlet oil line and the fitting to remove any dirt, debris, and oil. Remove inlet oil line and adapter fitting from the pump cover. Use 1U-5718 Vacuum Pump in order to drain the oil out of the pump for the HEUI. Insert the tube on the vacuum pump into the opening in the pump for the HEUI. Refer to Illustration 1 for the correct location. Ensure that the tube is inserted as far as possible into the pump. Once
