Rating:
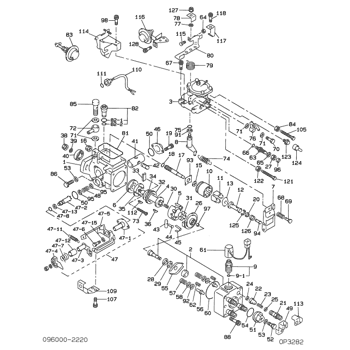
Information pump assy, injecti Denso
Product
Fuel Injection Pump
Vehicle engine
CHARADE CL-T
Engine
CL-T
Serial start-end
8501--9601
Info
Injector Nozzle
093500-2460
Injector nozzle:
0935002460
KIT List:
Part name
Kit1
Kit2
Components :
Scheme #.#:
№
Qty
Part num
Name
Remarks
Manufacture num
000
[01]
09600-02220
PUMP ASSY, INJECTI
Include in ##:
09600-02220
as PUMP ASSY, INJECTI
Cross reference number
Part num
Firm num
Firm
Name
09600-02220
PUMP ASSY, INJECTI
Information:
Illustration 1 g00562623
Illustration 2 g00562627
Touch the "Enter Password" button. Touch the red "X" button in order to return to MMS operation.
Illustration 3 g00562653
You are now on the "Keyboard" window. Use the keyboard on the screen. Enter the MMS password. Touch the "Enter" key.Note: The default password is Marine. The external keyboard is required to change the password. Connect the keyboard to the PC. Depress "<Ctrl><Shift>P" and enter the new password. Touch the "Ok" key. You are now on the "MMS Configuration" window if the password was accepted.Several options are available. Touch the "MMS Setup" picture in order to configure the overall system. Touch the "Auxiliary Options" picture in order to configure the auxiliary input and display.Note: Touch the "Engine Hours" icon in order to change the engine hours. Match the "Engine Hours" meter and the mechanical gauge on the MECP.
Illustration 4 g00594454
Marine Monitoring System Setup
The following sections detail the required setup for system operation. Optional settings are detailed in the "Auxiliary Options" section.You configure the following options from the "MMS Setup" menu:
Type of Engine
Rated Speed Setting
Optional Sensors
Units
Modbus ConfigurationThe revision number and the part number is located below the "MMS Setup" icon.Connection for the Keyboard
The following MMS procedures require an external keyboard:
Change MMS password
Setup of Language
Auxiliary LabelsA keyboard with a PS/2 connection may be used. Plug the keyboard into the "keyboard" connection on the back of the PC.
Illustration 5 g00562670
Selection of the Engine
Touch the "MMS Setup" picture in order to configure the overall system. You are now on the "Engine Setup (Setpoint)" screen.Touch the desired engine. Touch the green check mark button. The button accepts the selection of the engine and the button accepts the rated speed setting.Touch the red "X" in order to cancel the selection. You are now on the "Gauge Options Setup" screen. Set the "Engine Rated Speed Set Point" by touching the numeric display under the label. Enter the desired set point in the numeric keyboard. Touch the "OK" button in order to accept the entry.
Illustration 6 g00594457
Options for the Gauges
The following options are available for the MMS:
Table 1
Sales Code Group Part Number Description of the upgrade to the transducer
552.10 146-9438 Upgrade to the aftercooler temperature sensor
Upgrade for the sensor for the oil cooler
Upgrade for the pressure contactor for the jacket water
552.20 147-2374 Upgrade for the pressure contactor for the starting air
552.30 148-0200 Sea water
Raw Water Select the optional gauge by touching the picture of the gauge. The gauge is indicated by a green check mark. Touch the gauge again. This will cause the gauge to be de-selected. Touch the green check mark in order to continue the MMS setup.
Illustration 7 g00594459
The system then proceeds to the "Engine Setup (units)" window.Selection of the Units
You are on the "Engine Setup (units)" window. Touch the appropriate units. "English" units or "Metric" units are available. Touch the green check mark button in order to continue the MMS setup.
Illustration 8 g00594463
Setup of the Language
Note: The external keyboard will be required for this


