Rating:
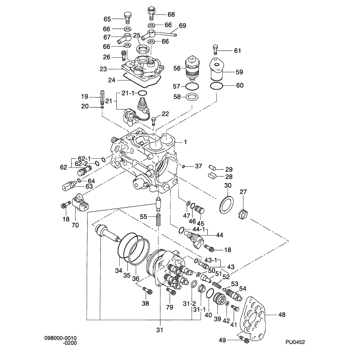
Information o-ring Denso
Include in ##:
09800-00010
as O-RING
Cross reference number
Part num
Firm num
Firm
Name
02947-50170
O-RING
Information:
start by:a) remove flywheelb) remove BrakeSaver (if so equipped)
The crankshaft rear seal and wear sleeve must both be removed because they must be replaced as a new set. The new seal set must not be separated.Carefully read Special Instruction, Form No. SMHS8508, that is included with each seal and wear sleeve before any handling of the seal group is made.
1. Put holes evenly around seal (1) with a sharp punch (2) as shown. 2. Install tool (A) and remove seal (1). 3. Install tool (C) in the rear seal bore.4. Install tool (B) between tool (C) and the wear sleeve. Turn tool (B) until the edge of the tool makes a flat place (crease) in the wear sleeve. Do this in two or more places until the wear sleeve is loose and can be removed.5. Remove tool (C) and the wear sleeve by hand.Install Crankshaft Rear Seal And Wear Sleeve
The front and rear seals and wear sleeves have different grooves in the seal. Because of this type of design, the front seal group for an engine is different from the wear seal group. If a seal group is installed on the wrong end of the engine, oil can actually be taken out of the engine instead of moving the oil back into the engine.
1. Fasten tooling (A) to the crankshaft rear gear.2. Use 6V1541 Quick Cure Primer to clean the outside diameter of the crankshaft rear gear and inside diameter of the wear sleeve in seal assembly (1).3. Put 9S3265 Retaining Compound on the outside diameter of the crankshaft rear gear and the inside diameter of the wear sleeve in seal assembly (1).
Make sure the seal is installed with the part number and the arrows showing crankshaft rotation toward the outside.
Do not separate the lip-type seal from the wear sleeve. The material in the large lip of the seal can be damaged easily. A scratch or rub (not visible) from a finger can damage the seal enough that it cannot be used. Install the sleeve in the seal. Once there is separation of the sleeve and lip-type seal they cannot be used again and must be replaced with a new seal group.Do not use any type of lubrication during installation of the seal group. If any type of lubrication is used in the installation of the seal group, early seal failure can result.
4. Put seal group (1) in position on tooling (A). Be sure direction arrows on the seal are the same as crankshaft rotation.5. Put clean engine oil on the face of washer on nut (2) [part of tooling (B)] that contacts the installer.6. Install tooling (B) onto tooling (A), and install nut (2) [part of tooling (B)] on the threaded shaft of tooling (A).7. Tighten nut (2) until tooling (B) contacts tooling (A).8. Remove tooling (A) and (B).end by:a) install flywheelb) install BrakeSaver (if so equipped)
