Rating:
Information injection nozzle Denso
Compare Prices: .
As an associate, we earn commssions on qualifying purchases through the links below

$84.61
13 Nov 2024
KR: Adabus
DN12SD12 Fuel Injector Nozzle 093400-0100,0434250027,105000-1600 for Sachs ISHIKAIMA for Kubota 6Pieces/Lot
Generic
Generic

$20.50
15 Oct 2024
KR: Adabus
Injector Nozzle DN12SD12 093400-0100 0434250027 105000-1600 Compatible with for Kubota Tractor B5200D B5200E B7100 B7100HST-DT
Generic Package Includes: Injector Nozzle * 1 | Condition: Aftermarket Product | Not Sure This Part is Suitable to We'll Reply You as soon as Possible || Compatible with For Kubota Diesel Engine D750 || Compatible with For Kubota Tractor B5200D B5200E B7100 B7100HST-DT B7100HST-E B7100HST-II-DT
Generic Package Includes: Injector Nozzle * 1 | Condition: Aftermarket Product | Not Sure This Part is Suitable to We'll Reply You as soon as Possible || Compatible with For Kubota Diesel Engine D750 || Compatible with For Kubota Tractor B5200D B5200E B7100 B7100HST-DT B7100HST-E B7100HST-II-DT

$13.03
02 Nov 2024
KR: Adabus
Diesel Fuel Injector 093400-0100 0434250027 105000-1600 Diesel Engine Injector Nozzle DN12SD12 for ISHIKAIMA LET852 - (Color: DN12SD12)
Generic Color: DN12SD12
Generic Color: DN12SD12
Include in ##:
Number on scheme 002

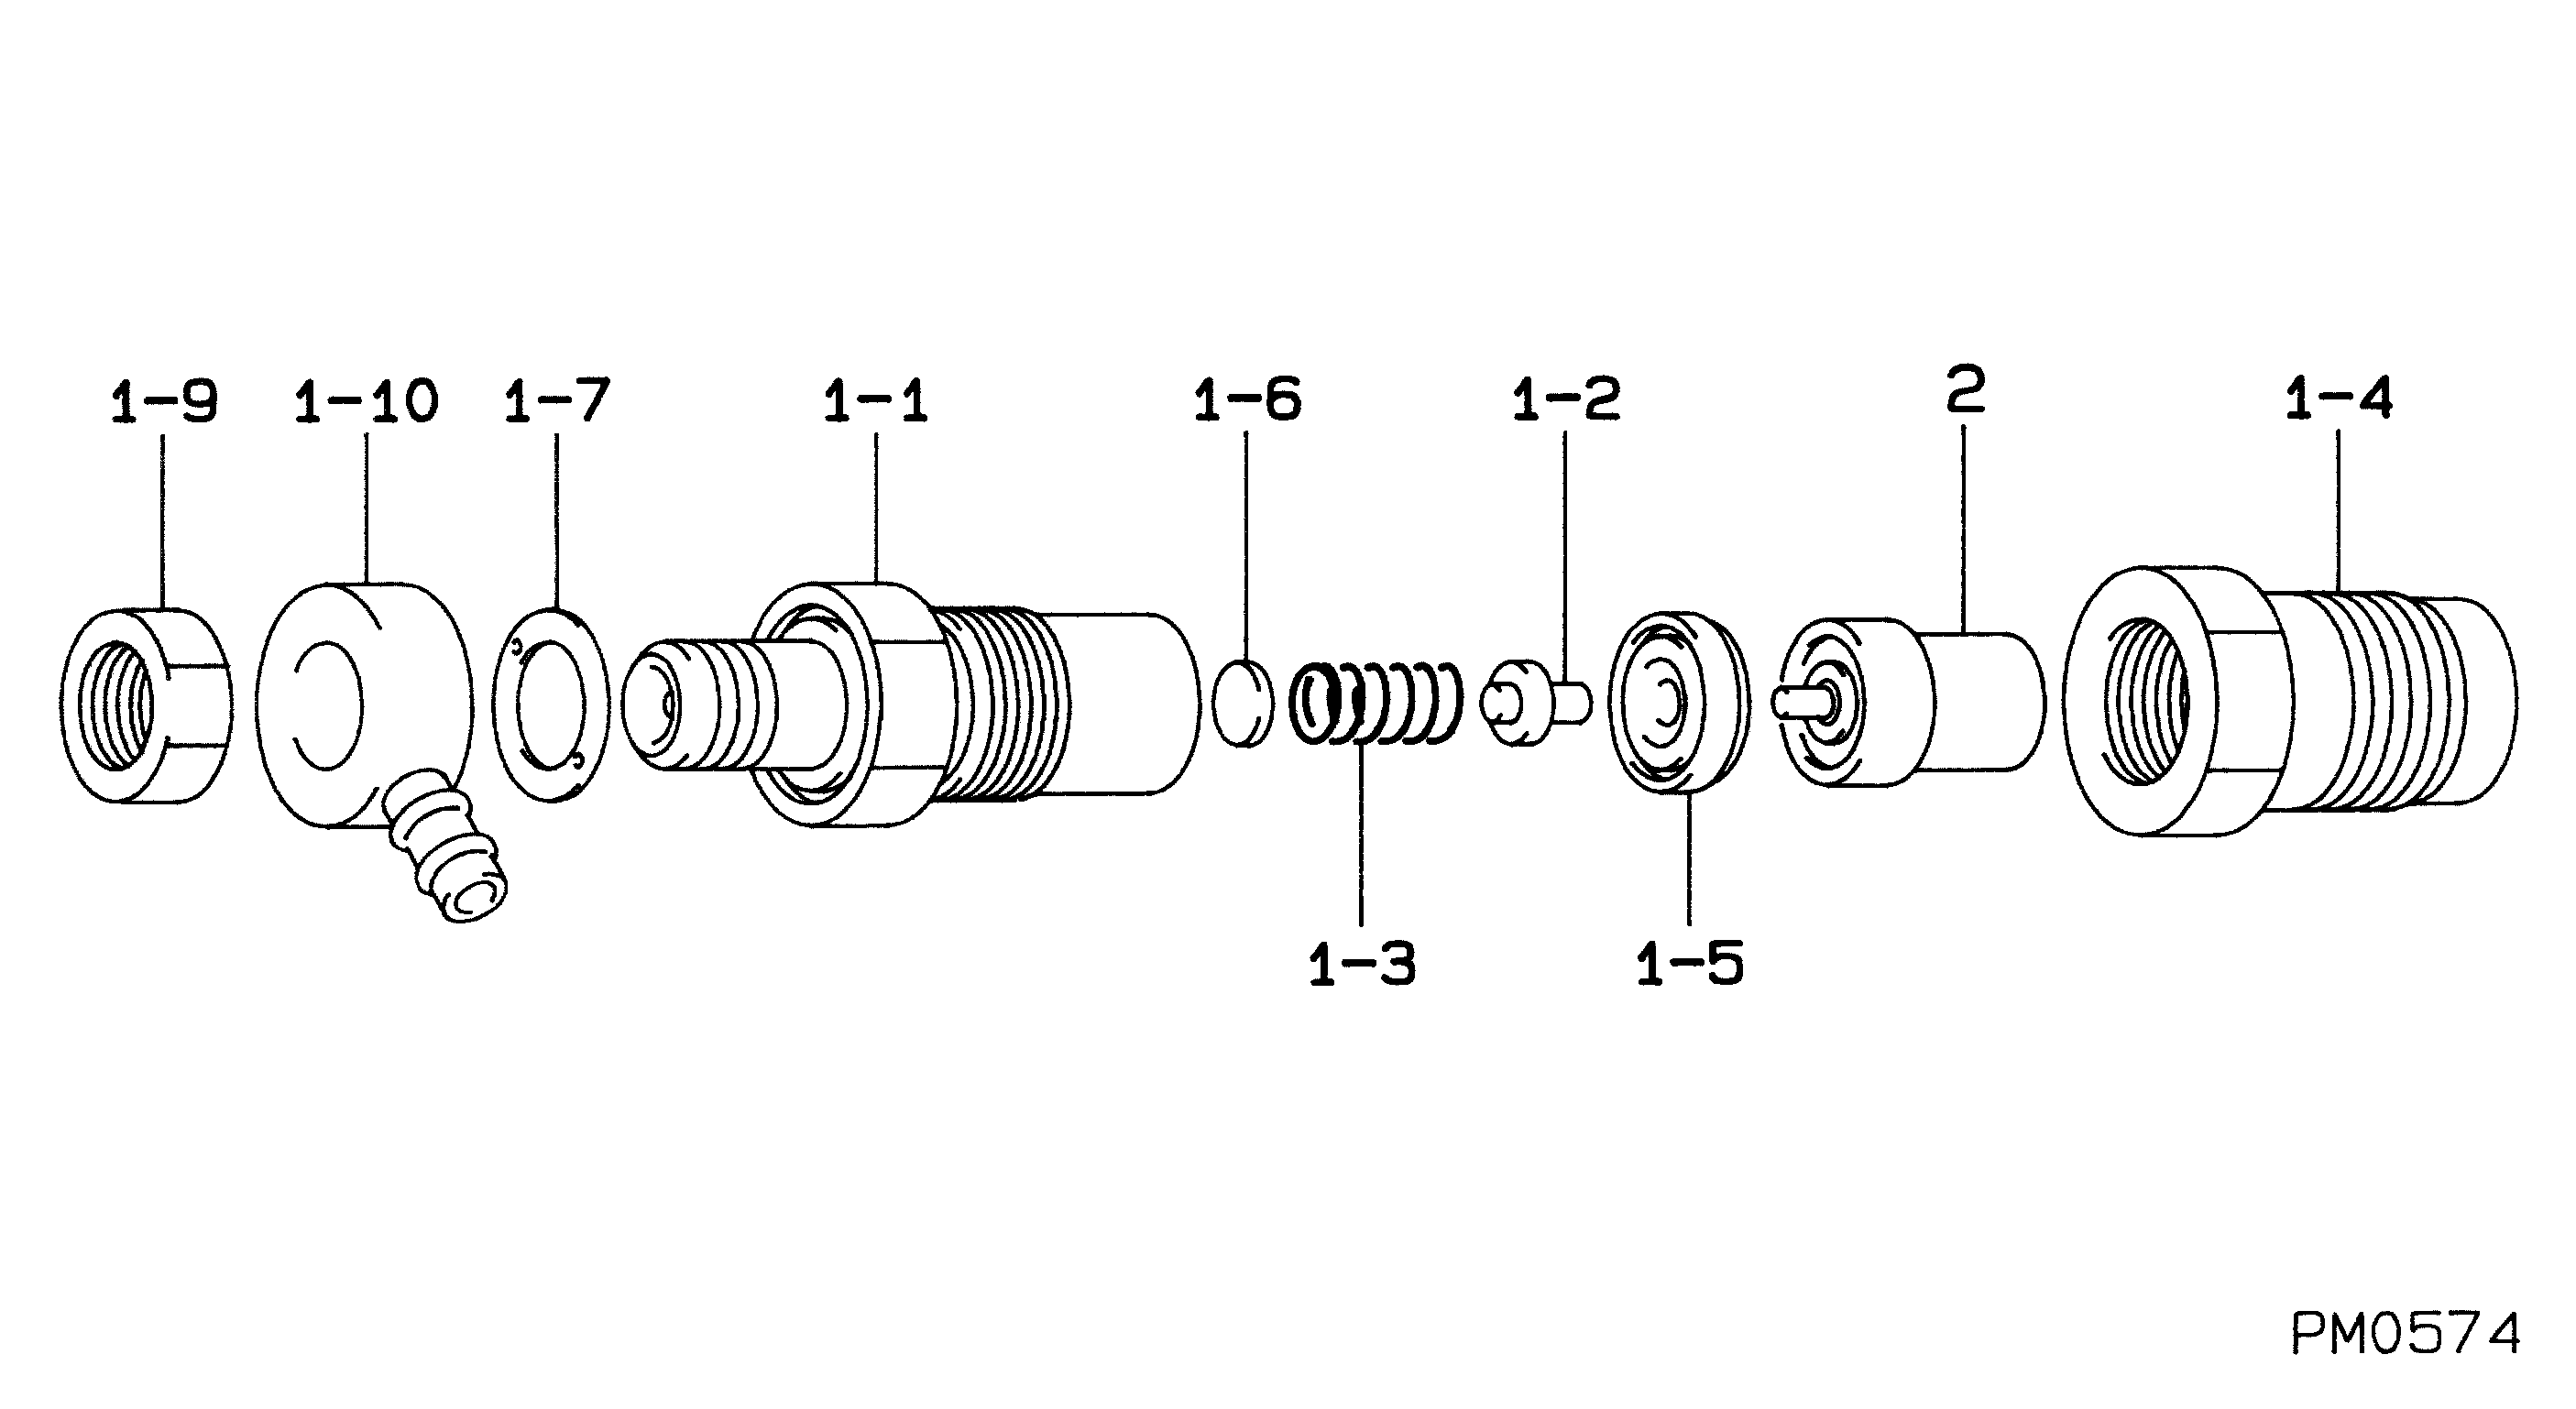
09350-01560
as NOZZLE ASSY
Cross reference number
Part num
Firm num
Firm
Name
093400-1160
105000-1600
ZEXEL
INJECTION NOZZLE
093400-1160
0434250027
BOSCH
INJECTION NOZZLE
093400-1160
0434250992
BOSCH
INJECTION NOZZLE
093400-1160
5643014
CAV
INJECTION NOZZLE
093400-1160
5643085
CAV
INJECTION NOZZLE
093400-1160
ADN12SD12
AMBAC
INJECTION NOZZLE
Information:
Start By:a. remove radiator
Keep all parts clean from contaminants. Contaminants put into the system may cause rapid wear and shortened component life.
1. Loosen bolt (4), bolt (5), and bolt (6). Remove belts (3).2. Remove bolts (2) and fan (1). 3. Remove bolt (7) and washer (8). Put enough spacers (10) on bolt (7) to get approximately 3.18 mm (.125 in) of clearance between washer (8) and vibration damper and pulley assembly (9). Install bolt (7), washer (8), and spacers (10).
If spacers (10) are not used, damage to the bolt and/or crankshaft can result when the vibration damper and pulley are removed from the crankshaft.
4. Install tool (A) as shown, and loosen vibration damper and pulley assembly (9).5. Remove tool (A), bolt (7), washer (8), spacers (10), and vibration damper and pulley assembly (9). 6. If necessary, remove bolts (11) and vibration damper (12). The following steps are to install the crankshaft vibration damper and pulley. Inspect the vibration damper housing for leakage or dents (damage housing). If either condition exists, a replacement of the vibration damper must be made.7. Install vibration damper (12) on pulley (13). Install bolts (11).8. Install vibration damper and pulley assembly (9) and install bolt (7), spacers (10) and washer (8).
The flat side of washer (8) must be installed toward vibration damper and pulley assembly (9).
9. Tighten bolt (7) to a torque of 284 to 340 N m (210 to 250 lb ft). Hit bolt (7) with a hammer and retighten to a torque of 284 to 340 N m (210 to 250 lb ft).10. Position belts (3). Tighten bolts (4), (5), and (6). Use a belt tension gauge and make an adjustment of the belts. Measure the belt farthest from the engine. Tighten new belts until the gauge indication is 534 22 N (120 5 lb ft). Operate the engine at high idle for a minimum of 30 minutes after installing radiator and guards. Make another adjustment of the belt tension. The correct gauge indication for a used belt is 400 44 N (90 10 lb.). Tighten bolt (4), bolt (5), and bolt (6).11. Install fan (1) and bolt (2).End By:a. install radiator
Perform Scheduled Oil Sampling on oil wetted compartments after performing service work to check for contaminants left in the system following repair. Contaminants put into the system may cause rapid wear and shortened component life.