Rating:
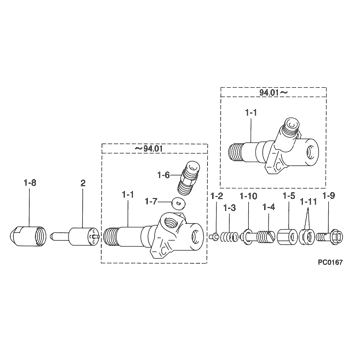
Information holder assy, nozzl Denso
Include in ##:
Cross reference number
Part num
Firm num
Firm
Name
09310-04262
HOLDER ASSY, NOZZL
Information:
(1) Torque for bolt that holds the impeller ... 39 3 N m (28 2 lb ft)(2) Shaft diameter at carbon seal assembly seat area must be ... 19.10 0.05 mm (.752 .002 in) Use 4C9500 Quick Cure Primer to clean the water pump shaft and the ceramic ring seal counterbore in the pump housing.(3) Ring and water seal. Use a 125-9622 Seal Installation Tool and hand pressure to install the rubber seal and ceramic ring as a unit in the pump housing bore. Make sure the identification mark (holes or groove) on the ceramic ring face is installed inside the rubber seal.(4) Seal assembly. a. Remove the spring from the seal.b. Put clean water on the seal assembly as the only lubrication for assembly. Do not get any grease or oil on the seal faces.c. Do not stretch the rubber of the seal assembly at installation. If the seal is stretched, the service life is shortened.d. Use a 125-9622 Seal Installation Tool and hand pressure to install the seal assembly on the pump shaft until the carbon face makes light contact with the smooth face of the ceramic ring. The carbon seal assembly must rotate with the water pump shaft. Do not use any lubricant (except clean water) that will reduce the friction between the seal and the shaft.e. Install the carbon seal assembly spring.(5) Oil seal. Put a small amount of clean engine oil on the lip of the seal at assembly. Install it with the lip toward the bearings as shown.(6) Torque for bolt that holds the gear ... 215 40 N m (160 30 lb ft)Water Pump (135-4925 and 135-4926)
(1) With flat side towards housing install oil seal flush with housing using a suitable driver. DO NOT lubricate lip of seal.(2) Install Shaft. Shaft diameter at unitized seal assembly must be ... 19.10 .01 mm (.752 .0004 in). Using a 138-9299 Installation Tool over the shaft with the chamfer facing out, carefully insert the shaft into the oil seal. Position the shaft to center the oil seal lips on the shaft running surface. Then remove installation tool from shaft.(3) Install bearings. Slide the bearing assembly over the shaft and into the housing. Torque the bearing retainer plate bolts to ... 25 6 N m (19 4 lb ft)(4) Torque for gear retaining bolt ... 215 40 N m (158 30 lb ft)(5) Unitized seal. Using a 139-0088 Installation Tool and a suitable press to install the seal onto the pump shaft and into the housing bore, insure that the seal is fully seated in the housing bore. DO NOT use a hammer to install the seal as damage to ceramic sealing face will occur.(6) Bolt torque for the impeller retaining bolts is ... 39 3 N m (28 2 lb ft)
(1) With flat side towards housing install oil seal flush with housing using a suitable driver. DO NOT lubricate lip of seal.(2) Install Shaft. Shaft diameter at unitized seal assembly must be ... 19.10 .01 mm (.752 .0004 in). Using a 138-9299 Installation Tool over the shaft with the chamfer facing out, carefully insert the shaft into the oil seal. Position the shaft to center the oil seal lips on the shaft running surface. Then remove installation tool from shaft.(3) Install bearings. Slide the bearing assembly over the shaft and into the housing. Torque the bearing retainer plate bolts to ... 25 6 N m (19 4 lb ft)(4) Torque for gear retaining bolt ... 215 40 N m (158 30 lb ft)(5) Unitized seal. Using a 139-0088 Installation Tool and a suitable press to install the seal onto the pump shaft and into the housing bore, insure that the seal is fully seated in the housing bore. DO NOT use a hammer to install the seal as damage to ceramic sealing face will occur.(6) Bolt torque for the impeller retaining bolts is ... 39 3 N m (28 2 lb ft)
