Rating:
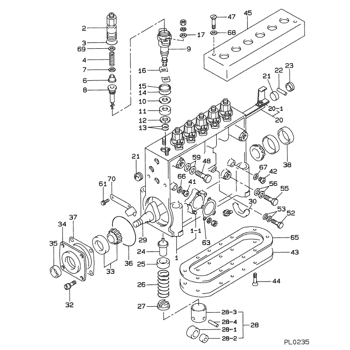
Information bearing, center Denso
Include in ##:
09010-05430
as BEARING, CENTER
Cross reference number
Part num
Firm num
Firm
Name
09036-10140
22837-1210
BEARING, CENTER
0903610140
22837-1210A
HINO
BEARING, CENTER
Information:
start by:a) remove turbocharger 1. Put a mark at the location of the cartridge with respect to turbine housing (1) and compressor housing (3).2. Loosen clamps (2) and make a separation of the housings from the cartridge.
When the nut is loosened, do not put a side force on the shaft.
3. Put cartridge (5) in tooling (A) and remove nut (4). 4. Use a press to push shaft (7) out of compressor wheel (6) and the cartridge. 5. Remove seal ring (8) and shroud (9) from the shaft. 6. Remove sleeve (10) from the backplate. 7. Remove two seal rings (11) from the sleeve. 8. Bend the locks back and remove bolts (12) and backplate (13) from the cartridge. 9. Remove collar (14) and ring (15) from the cartridge. 10. Remove bearing (16) from the cartridge. 11. Remove sleeve (17) from the cartridge. 12. Remove washer (18) from the cartridge. 13. Remove snap ring (19) from the cartridge with tooling (B). 14. Use tool (B) to remove snap ring (20) and sleeve (21). 15. Remove washer (22) from the cartridge.16. Remove snap ring (23) with tool (B).Assemble Turbocharger (Airesearch TV8103)
1. Clean all parts thoroughly before the turbocharger is assembled. Put clean engine oil on all parts. 2. Install lower snap ring (2) with tool (A).3. Install washer (1) in the cartridge. 4. Put sleeve (4) in position and install snap ring (3) with tool (A). 5. Install snap ring (5) with tool (A). 6. Put the washer in position and install sleeve (6). 7. Put bearing (7) in position on the cartridge. Make an alignment of the dowels with the holes in the bearing. 8. Put seal (8) in position on the cartridge.9. Install collar (9) with large diameter up. 10. Put backplate (10) in position and install bolts (13) and the locks. Tighten bolts (13) to a torque of 90 10 lb.in. (10.2 1.1 N m). 11. Put seals (11) in position on the spacer. 12. Put spacer (12) in position with the small flat up. 13. Put shaft assembly (14) in position in tooling (B).14. Put 6V2055 High Vacuum Grease in groove and on seal (16). Install the seal.15. Install shroud (15). 16. Put cartridge assembly (18) in position on the shaft assembly.17. Put a small amount of oil on the threads of the shaft and on face of the compressor wheel under the nut.
Do not put a side force on the shaft when the nut is tightened.
18. Install compressor wheel (17) and the nut. Tighten the nut to a torque of 120 lb. in. (14 N m) to make a seat for the impeller against the spacer. 19. Loosen nut (19) and tighten it to a torque of 30 lb. in. (3 N m) plus 90°. 20. Check end play with tooling (C) as shown. See SPECIFICATIONS for the correct end play dimension. 21. Put the cartridge and clamps (20) in position on compressor housing (22). Install turbine housing (21) on the cartridge. 22.
